Photography Tips

  • Instagram Image Size Guide for 2026 (Posts, Reels, Stories)

    Instagram updated its grid layout in 2025, replacing the classic square thumbnails with a taller 3:4 crop. That single change affected how every photo and video displays on your profile. Combined with new Reels length limits and higher ad resolution requirements, keeping track of the correct Instagram image sizes is more important than ever.

    We’ve put together this updated guide with all of the dimensions for Instagram in 2026, covering feed posts, carousels, Stories, Reels, profile pictures, and ads.

    Instagram Feed Post Dimensions

    After taking photos with your camera, you’ll want to crop them to one of Instagram’s supported aspect ratios before uploading. Here are the four options for feed posts:

    Square: 1080 x 1080 pixels (1:1 aspect ratio)

    Portrait: 1080 x 1350 pixels (4:5 aspect ratio)

    Tall Portrait (New): 1080 x 1440 pixels (3:4 aspect ratio)

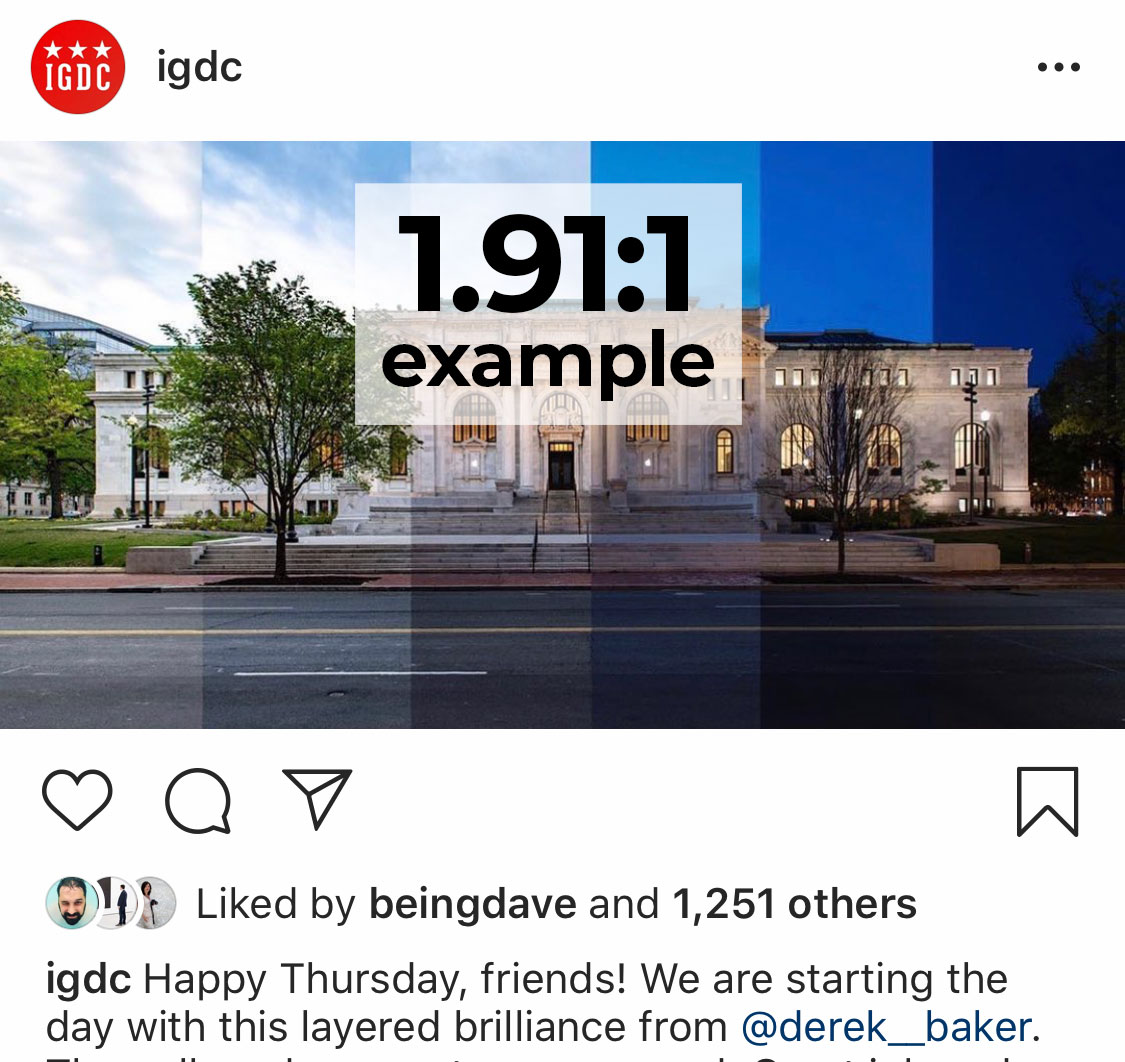
    Landscape: 1080 x 566 pixels (1.91:1 aspect ratio)

    Example of landscape Instagram image at 1.91:1 aspect ratio
    Example of landscape (horizontal) photos on Instagram at 1.91:1.

    The 3:4 ratio was introduced alongside the 2025 grid update and gives your photos more vertical space in the feed. Portrait (4:5) remains the most popular choice for maximizing screen real estate, but 3:4 now matches the grid thumbnail crop exactly.

    Example of portrait Instagram image at 4:5 aspect ratio
    Example of portrait (vertical) photos on Instagram at 4:5.

    Instagram accepts uploads up to 1080 pixels wide. Anything larger gets downscaled, and anything under 320 pixels wide gets upscaled (which reduces quality). The maximum photo file size is 30 MB, and supported formats include JPG, PNG, and BMP.

    Feed videos follow the same aspect ratio rules. The key differences: videos can be 3 seconds to 60 minutes long (15 minutes max on mobile uploads), the max file size is 4 GB, and Instagram supports MP4 and MOV formats.

    Carousels support up to 20 slides per post, mixing photos and videos freely. The important rule: your first slide’s aspect ratio applies to every slide in the carousel. Instagram auto-crops any slide that doesn’t match.

    For the best results, crop all slides to the same ratio before uploading. We recommend 1080 x 1350 pixels (4:5) or 1080 x 1440 pixels (3:4) for carousels, since vertical images take up more space in the feed and get more engagement.

    All four feed aspect ratios work for carousels: 1:1, 4:5, 3:4, and 1.91:1. File size limits are the same as regular posts (30 MB per photo, 4 GB per video).

    Instagram Story Dimensions

    Stories fill the entire phone screen, so you’ll want to use a 9:16 aspect ratio.

    Instagram Story Dimensions: 1080 x 1920 pixels (9:16 aspect ratio)

    You can upload other aspect ratios to Stories, but they won’t fill the frame. Instagram will add blurred bars or a background color to fill the empty space.

    Keep text and important elements within the center 1080 x 1420 pixel area. The top ~250 pixels are covered by your username and timestamp, and the bottom ~250 pixels overlap with the reply bar and swipe-up elements. Story videos can be up to 60 seconds per clip.

    Instagram Reels Dimensions

    Reels use the same full-screen vertical format as Stories.

    Instagram Reels Dimensions: 1080 x 1920 pixels (9:16 aspect ratio)

    Instagram expanded Reels significantly over the past year. You can now record Reels up to 20 minutes long in the app, though Reels under 3 minutes get the best algorithmic reach. For maximum discovery, Instagram recommends keeping Reels under 90 seconds.

    Your Reel displays differently depending on where it appears. In the Reels tab, it shows at full 9:16. In the main feed, it’s cropped to 4:5 (1080 x 1350). On your profile grid, it’s cropped to 3:4 (1080 x 1440). Because of this, keep your most important content centered and avoid placing text too close to the edges.

    Reels Cover Photo: 1080 x 1920 pixels (9:16 aspect ratio). You can choose a frame from your video or upload a custom cover from your camera roll. Since the cover gets cropped to 3:4 on your grid, center any text or key visuals in the middle of the image.

    For the safe zone, keep text and calls to action within the center 1080 x 1420 pixels. The top 250 pixels and bottom 340 pixels are covered by UI overlays (username, audio info, like/comment buttons).

    Instagram Profile Picture Size

    Your profile picture displays as a small circle: 110 x 110 pixels on mobile and 150 x 150 pixels on desktop. However, Instagram stores it at a higher resolution.

    Instagram Profile Picture: 320 x 320 pixels minimum (1:1 aspect ratio)

    Upload at 320 x 320 or larger for the sharpest result. Center your subject in the frame since Instagram crops the image into a circle. The max file size for profile photos is 10 MB.

    Instagram Ad Dimensions

    If you run Instagram ads, Meta now recommends higher resolutions than organic posts. Here are the current specs:

    Ad TypeRecommended ResolutionAspect RatioMax File Size
    Feed Image Ad1440 x 1440 px1:1 (range: 1.91:1 to 4:5)30 MB
    Feed Video Ad1440 x 1880 px4:5 (range: 1.91:1 to 4:5)4 GB
    Story/Reel Image Ad1440 x 2560 px9:1630 MB
    Story/Reel Video Ad1440 x 2560 px9:164 GB
    Carousel Ad (per card)1080 x 1080 px1:1 or 4:530 MB (image) / 4 GB (video)

    Story and Reel ads share the same safe zone guidelines as organic content: avoid the top 14% and bottom 20% of the frame. Meta also recommends minimal text overlays on ad creatives for better delivery.

    Quick Reference: All Instagram Dimensions

    Content TypeResolutionAspect Ratio
    Feed Post (square)1080 x 1080 px1:1
    Feed Post (portrait)1080 x 1350 px4:5
    Feed Post (tall portrait)1080 x 1440 px3:4
    Feed Post (landscape)1080 x 566 px1.91:1
    Carousel (per slide)Match first slide1:1, 4:5, 3:4, or 1.91:1
    Story1080 x 1920 px9:16
    Reel1080 x 1920 px9:16
    Reel Cover Photo1080 x 1920 px9:16
    Profile Picture320 x 320 px (min)1:1
    Feed Ad1440 x 1440 px1:1 to 4:5
    Story/Reel Ad1440 x 2560 px9:16

    Tips for Better Image Quality on Instagram

    Instagram compresses every upload, but you can minimize quality loss with a few adjustments:

    Export at the exact target dimensions. If you upload a 4000-pixel-wide photo, Instagram downscales it and applies heavier compression. Exporting at 1080 pixels wide gives Instagram less to compress.

    Use the sRGB color space. Instagram converts everything to sRGB. If you export in Adobe RGB or ProPhoto RGB, colors may shift noticeably. Set your export profile to sRGB in Lightroom, Photoshop, or your preferred editor.

    Save as JPEG at 85-95% quality. This range gives you a good balance between file size and sharpness. Going above 95% increases file size without visible benefit, and Instagram re-compresses it anyway.

    Turn on “Upload at highest quality.” In the Instagram app, go to Settings > Account > Data Usage and enable this toggle. It prevents the app from applying extra compression on upload.

    Add light sharpening before upload. Instagram’s compression softens images slightly. A small bump of +10-15% sharpening in your editor compensates for this. For quick resizing without an editor, a tool like Crush Image can handle the job.

    Use H.264 codec for video. Export videos as MP4 with H.264 encoding at 30 FPS. This is the format Instagram handles best, and it keeps file sizes manageable.

    One more thing to keep in mind: Instagram strips all EXIF data from uploads. Your camera info, GPS coordinates, and other metadata won’t be visible to anyone viewing your post.

    Frequently Asked Questions

    Is the new Instagram grid 4:5 or 3:4?

    The grid displays thumbnails at 3:4. Instagram made this change in August 2025, replacing the old 1:1 square grid. Your existing posts aren’t affected when viewed full-size, but their grid thumbnails are now center-cropped to 3:4. You can adjust the thumbnail crop in the post editor.

    What’s the best aspect ratio for Instagram posts in 2026?

    For photos, 4:5 (1080 x 1350) gives you the most screen space in the feed. The newer 3:4 (1080 x 1440) is also a strong choice because it matches the grid crop perfectly, so your thumbnails won’t get clipped unexpectedly. Square (1:1) still works, but it takes up less space in the feed than vertical formats.

    How do I make a picture fit on Instagram without cropping?

    When uploading a photo, tap the expand icon (two arrows) in the bottom-left corner of the preview. This unlocks the aspect ratio so Instagram doesn’t force a square crop. If your photo doesn’t fit any supported ratio (like a very wide panorama), Instagram will add bars to fill the remaining space.

    What is the Instagram image file size limit?

    Photos can be up to 30 MB. Videos can be up to 4 GB across all formats (feed, Stories, Reels, and carousels). Profile pictures have a 10 MB limit. For the best quality, aim to keep photos between 500 KB and 2 MB.

    How long can Reels be in 2026?

    Instagram now supports Reels up to 20 minutes long when recording in the app. However, Reels over 3 minutes won’t be recommended to new audiences through the algorithm. For the best reach, keep Reels under 90 seconds.


    Instagram’s dimension requirements don’t change often, but when they do (like the 3:4 grid update), the impact is significant. We’ll keep this guide updated as new changes roll out. If you’re heading out to photograph some of DC’s most Instagrammable spots, having these dimensions saved will help you get the perfect crop every time.


  • The 18 Most Instagrammable Places in Washington DC

    We all know how hard it can be to fill your Instagram feed with beautiful photos. 📷

    After years of featuring photos on Instagram via IGDC we’ve found some of the best places to photograph in DC. From typical places like the Tidal Basin and Washington Monument to less travelled spots like Blind Whino and Blagden Alley there is something here for locals and travelers.

    So grab your camera and hop on the metro;
    here are our favorite places to Instagram in Washington DC:


    1. Culture House DC (formerly Blind Whino)

    DC’s most colorful church can easily turn heads with its incredible mural. In addition to the exterior; Blind Whino also offers art shows inside which can be found on their website.

    700 Delaware Ave SW, Washington, DC 20024

    Blind Whino in DC by @golightly

    2. The National Arboretum

    On a nice day a stop by the National Arboretum is a must. With acres of scenic fields, trails, and the Capitol Columns you can spend a couple of hours exploring the Arboretum.

    The Arboretum also holds a collection of unique bonsai trees that can be viewed seasonally.

    3501 New York Ave NE, Washington, DC 20002

    https://www.instagram.com/p/BQZrQ5_hUIo/

    3. Union Market

    Union Market is full of unique shops, coffee shops, and food stands but the outside is remarkable. Covered in murals that change periodically you’re sure to find something to Instagram (plus you can grab an ice cream at Trickling Springs).

    One of the most popular sights at Union Market is the heart wall full of rainbow hearts that was created by Mr. Brainwash for International Women’s Day in 2015.

    1309 5th St NE, Washington, DC 20002

    https://www.instagram.com/p/BY9dn1llGCI/

    4. US Capitol

    The Capitol is hard to miss, in the heart of DC the United States Capitol looks great at anytime of day. Plus if you’re awake for sunrise the Capitol Reflecting Pool offers a fantastic reflection of the Capitol and sky. If you’ve never been to the Capitol it should be high on your list, take a walk around the entire building for its full affect.

    East Capitol St NE & First St SE, Washington, DC 20004

    https://www.instagram.com/p/Bl0cy0kAOXV/

    There is much to explore in the National Gallery of Art. Some of the most notable things to see are the light tunnel in the basement and the giant blue Rooster on the roof of the East building. The west building is also full of stunning halls and historical pieces of artwork.

    6th & Constitution Ave NW, Washington, DC 20565

    https://www.instagram.com/p/BjDCwmaFhTy/

    6. The Line Hotel

    DC Instagrammers love stopping by the lobby of the Line Hotel with their unique stairway with mirror in the corner. They also have a cute coffee shop in the lobby and occasionally have events on the rooftop.

    1770 Euclid St NW, Washington, DC 20009

    https://www.instagram.com/p/BdaUC0Gghi2/

    Right next to the Capital One Arena in Chinatown is the National Portrait Gallery. Full of impressive hallways and courtyards the Portrait Gallery has plenty of unique art exhibits to photograph.

    8th St NW & F St NW, Washington, DC 20001

    Kogod courtyard at the National Portrait Gallery

    8. US Botanic Garden

    If you love greenery the Botanic Garden should be right up your alley. With different rooms featuring different environments and unique series of plants it’s a no brainer to stop by. Plus if you’re visiting the Capitol it’s only a few blocks away.

    In addition to plants the Botanic Garden is also decorated for holidays.

    100 Maryland Ave SW, Washington, DC 20001

    Main courtyard of the Botanic Garden

    9. The Watermelon House

    This colorful house is hard to miss with its massive watermelon mural on the side. Whether you’re just taking a photo of the mural or doing a #watermelonjumps it’s a blast to see this colorful mural.

    1112 Q St NW, Washington, DC 20009

    https://www.instagram.com/p/BbErRJ-ASW6/

    10. Love Mural in Blagden Alley

    Blagden Alley is loaded with interesting murals, make sure to stop by La Colombe which is one of DC’s best coffee shops.

    Blagden Alley, Washington, DC 20001

    Love Mural in Blagden Alley

    11. Lincoln Memorial and Reflecting Pool

    The National Mall is a must stop especially the Reflecting Pool and Lincoln Memorial. Open all day and night the Reflecting Pool is a awe-inspiring spot everyone should visit at least once.

    2 Lincoln Memorial Cir NW, Washington, DC 20024

    https://www.instagram.com/p/BI-1UVQgZOf/

    12. CityCenterDC

    The main alley of CityCenterDC is always decorated for the season, from winter to fall there is always something to photograph at City Center.

    825 10th St NW, Washington, DC 20001

    https://www.instagram.com/p/BimvAT0A4NX/

    13. The Wave Wall in Georgetown

    The huge wave mural on the side of a row home in Georgetown is great for taking a portrait in front of.

    3510 O St NW, Washington, DC 20007


    14. The Bridge at Yards Park

    The Yards park has great restaurants but also an impressive bridge that is perfect for portraits.

    355 Water St SE, Washington, DC 20003

    https://www.instagram.com/p/BgqfU5Pnz46/

    15. Call Your Mother in Georgetown

    It’s hard to miss this giant pink building in Georgetown. This colorful building houses Call Your Mother which is known for their delicious bagels.

    3428 O St NW, Washington, DC 20007

    https://www.instagram.com/p/CY_uSQ0LJRI/

    16. Chinatown Friendship Arch

    The massive Friendship Arch in Chinatown is a staggering archway that is impressive day or night.

    H St NW & 7th Street NW, Washington, DC 20001

    https://www.instagram.com/p/Blqol3QglpP/

    17. Union Station

    The grand hall in Union Station has beautifully painted gold ceilings.

    Union Station, Washington DC

    https://www.instagram.com/p/Bw1lVTKBUDJ/

    18. Artechouse

    One of the newest interactive experiences in DC is Artechouse which features large displays projected on walls.

    1238 Maryland Ave SW, Washington, DC 20024

    ARTECHOUSE’s In Peak Bloom exhibit by @golightly

    For more Instagram inspiration in Washington DC be sure to check out the #IGDC feed and to tag your photos.

    Let us know your favorite places to Instagram in the comments!

    Looking for even more places to explore? Check out our guides to the best gardens in DC and our Instagram image size guide to make sure your photos look their best.


  • The Best Cameras for Instagram in 2026 (Buyer’s Guide)

    One of the best things you can do to improve your Instagram feed is to upgrade your camera. Whether you’re outgrowing your smartphone or looking for your first mirrorless body, here are the best cameras for Instagram in 2026.

    The camera market has shifted almost entirely to mirrorless. Canon, Nikon, and Sony have all stopped developing new DSLRs, and new lenses are mirrorless-only. That’s good news for Instagrammers: mirrorless cameras are smaller, lighter, and packed with features like fast autofocus, 4K video, and wifi transfer that make the phone-to-feed workflow simple.

    We’ve tested and researched cameras across every price range. Things like weight, price, image quality, and video capabilities vary between these picks, so review all of the options before choosing. Investing in the right camera now can serve you for years.

    Canon EOS R50 – Best Entry-Level Camera for Instagram

    The Canon EOS R50 is the easiest step up from a smartphone. At around $680 for the body ($800 with the 18-45mm kit lens), it delivers image quality that will immediately set your feed apart.

    Built around a 24.2-megapixel APS-C sensor, the R50 uses Canon’s Dual Pixel CMOS AF II system for fast, reliable autofocus with eye, face, and animal detection. It shoots at 12fps with the electronic first curtain shutter (15fps with the full electronic shutter), so you won’t miss fast-moving moments. Video shooters get oversampled 4K/30p from 6K, which produces clean, detailed footage.

    The vari-angle touchscreen flips forward for selfies and folds against the body for protection in your bag. Built-in wifi and Bluetooth let you transfer photos to your phone through Canon’s Camera Connect app, so you can edit and post from anywhere.

    Canon discontinued their older EOS M mirrorless system, so the R50 is now the gateway into Canon’s RF mount ecosystem. That matters because RF lenses are where Canon puts all their new development. If you start here and upgrade later, your lenses move with you.

    For anyone on a tighter budget, the Canon EOS R100 (~$480) cuts a few features (no flip screen, no touchscreen, slower burst) but still delivers great image quality using the same RF mount.

    Canon EOS R50 Mirrorless Vlogging Camera (Body Only/Black), RF Mount, 24.2 MP, 4K Video, DIGIC X Image Processor, Subject Detection & Tracking, Compact, Smartphone Connection, Content Creator
    • Compact, lightweight RF mount camera with a 24.2 Megapixel CMOS (APS-C) sensor and DIGIC X processor.
    • 4K uncropped movie with Dual Pixel CMOS AF II at up to 30 fps oversampled from 6K and Full HD High-frame rate movie at up to 120 fps. Movie for Close-up Demo Mode quickly switches focus when a product is brought close to the camera.

    Nikon Z50II – Best Mid-Range Mirrorless Camera

    The Nikon Z50II (~$910 body, ~$1,097 with the 16-50mm kit lens) sits in the sweet spot between entry-level and pro. It borrows the EXPEED 7 processor from Nikon’s flagship Z8 and Z9, which gives it autofocus performance you wouldn’t expect at this price.

    With 209 phase-detect autofocus points and automatic subject detection for nine categories (people, animals, vehicles, and more), the Z50II locks focus quickly and tracks accurately. Burst shooting hits 30fps, making it one of the fastest cameras under $1,000.

    The 20.9-megapixel APS-C sensor handles low light well, and Nikon’s color science produces natural skin tones that look great on Instagram without heavy editing. Video specs include 4K/30p oversampled from 5.6K for sharp footage.

    The fully articulating rear LCD flips forward for vlogging and selfies, and the improved deep handgrip makes the camera comfortable to hold for long shoots. Wifi and Bluetooth are included for wireless image transfer through Nikon’s SnapBridge app.

    If you already know you want Nikon and prefer something purely for video and content creation, the Nikon Z30 (~$710) drops the electronic viewfinder in favor of a screen-only design built for vloggers.

    Nikon Z50 II | Compact mirrorless Stills/Video Camera with Easy Color presets and Wireless Photo Sharing | Nikon USA Model
    • Go Beyond Your Phone: Capture lifelike colors and incredible details from dawn to dusk thanks to a superior 20.9-megapixel DX format (APS-C size) sensor several times larger than that of a typical smartphone, but still lightweight and compact enough to fit in a small bag.
    • Find Your Aesthetic: At the press of the Picture Control button, choose from 31 built-in presets designed to make your photos and videos stand out. Create and save your own Picture Control presets or download bespoke Cloud Picture Controls directly to your Z50II from Nikon Imaging Cloud. Play with results in real-time as you shoot and open up a world of creative possibilities.

    Sony a7C II – Best Compact Full-Frame Camera

    If you want the highest image quality possible in a portable body, the Sony a7C II ($2,199 body) is the best camera for Instagram. It packs a 33-megapixel full-frame sensor (the same as the a7 IV) into a body that weighs just 514 grams. That’s small enough to carry all day without fatigue.

    Full-frame cameras have larger sensors than APS-C models, which means better low-light performance, more dynamic range for editing, and that natural background blur (bokeh) that stands out in feeds. The a7C II adds AI-enhanced Real-Time Eye AF for people and animals, plus 7-stop in-body stabilization that keeps handheld shots sharp even in dim conditions.

    Video capabilities are strong: 4K/30p oversampled from 7K, 4K/60p in Super 35 mode, and 10-bit 4:2:2 color for serious color grading. The fully articulating touchscreen and built-in wifi make the edit-and-post workflow quick.

    Sony’s E-mount system has the largest selection of full-frame mirrorless lenses on the market, including their high-end G Master line. If you’re into travel photography, the a7C II’s compact size and full-frame quality make it easy to throw into a bag and forget it’s there until you need it.

    When I decided to purchase a “big-girl” camera I went to the Sony α7R II. I have never been disappointed either. The α7RII has an incredibly powerful 42mp sensor so shooting in RAW brings out every colorful detail of your picture. The G Master lenses are expensive, but worth the investment. My favorite all around city lens is the GM 16-35mm. It is my “go to” lens. The high ISO is crazy good (I’ve taken at 12,800 ISO) and thanks to its amazing pixel count, what noise there might be, is hidden. Its viewfinder is great, and the camera itself is comfortable to hold. It’s sturdy and well made. I have never regretted my choice.
    @dccitygirl

    The a7C II carries forward everything @dccitygirl loves about Sony’s full-frame line in an even smaller body. If budget is a factor, the Sony a7 IV (~$1,998) has dropped in price since the a7 V launched and remains an excellent full-frame option.

    Sony Alpha 7C II Full-Frame Interchangeable Lens Camera – Black
    • Incredibly compact and lightweight, packed with full-frame performance
    • 33.0MP full-frame Exmor R CMOS sensor

    Smartphone Camera (iPhone/Pixel/Galaxy)

    iPhone photo of the US Capitol at sunset
    iPhone photo at the US Capitol. 📸by @someguy

    If you’re on Instagram, you already have a great camera in your pocket. The best smartphone cameras in 2026 produce results that rival dedicated cameras in good light:

    • iPhone 17 Pro: 48MP triple-lens system, ProRes video, Cinematic Mode, and the smoothest phone-to-Instagram workflow on any device. AirDrop makes transferring to other Apple devices instant.
    • Google Pixel 10 Pro: Google’s computational photography produces the most Instagram-ready images with the least effort. Night Sight remains the best low-light mode on any phone, and the price (~$999) undercuts Apple and Samsung.
    • Samsung Galaxy S26 Ultra: A 200MP main sensor with an f/1.4 aperture for the best low-light phone photos. Also has the longest zoom range (up to 100x with AI-enhanced zoom).

    Phone Lenses: If you want to extend your smartphone’s capabilities, Moment lenses are still the premium option. Their newer T-series line works with current phones and adds wide-angle, telephoto, and macro options. It’s a great way to make your Stories and Reels more dynamic with a wider field of view.

    Editing Apps: We recommend Lightroom, Snapseed, and VSCO for mobile editing. The filters and tools built into Instagram have also gotten quite good. Learning to edit well will improve your photos regardless of what camera you use.

    Shooting RAW on Mobile: You can take more control over your mobile photography by shooting in RAW format. Apps like Lightroom and Halide let you capture RAW files that give you far more editing flexibility than standard JPEGs. iPhone Pro models and recent Pixels both support RAW capture natively. If you’re serious about mobile photography, RAW is the single biggest quality improvement you can make. Be sure to also check out our Instagram image size guide so your photos are cropped to the right dimensions before posting.

    Canon EOS R6 Mark III – Best Pro Camera for Instagram

    For photographers who want the best Canon has to offer, the Canon EOS R6 Mark III ($2,799 body, released November 2025) is a powerhouse. Its 32.5-megapixel full-frame sensor captures outstanding detail, and the autofocus system is fast enough to track anything from birds in flight to street scenes.

    Video capabilities are overkill for Instagram in the best way: 7K internal RAW recording gives you massive flexibility to crop and reframe footage for different aspect ratios (perfect for repurposing content across Stories, Reels, and feed posts). Burst shooting hits 40fps with a 20-frame pre-capture buffer, so the camera starts saving frames before you fully press the shutter.

    Canon’s RF lens ecosystem has matured rapidly, with over 40 native lenses available. Their high-end L-series lenses (the ones with the red ring) are weather-sealed and built for professional use. The camera body itself features 8.5-stop in-body stabilization and a fully weather-sealed build, so rain and snow won’t be a concern when you’re out shooting at DC’s most Instagrammable locations.

    Canon also makes the Canon EOS R8 (~$1,499), which shares the same RF mount in a lighter, more affordable full-frame body. It trades some pro features (no IBIS, single card slot) for a much lower price.

    Canon EOS R6 Mark III Body
    • 32.5MP full-frame CMOS Image Sensor and DIGIC X Image Processor.
    • Up to 40-fps Photo Shooting with 20-frames of pre-continuous shooting.

    DJI Osmo Action 5 Pro – Best Action Camera for Instagram

    If you’re capturing outdoor adventures, sports, or anything where a full-size camera isn’t practical, the DJI Osmo Action 5 Pro (~$349) delivers the best value in action cameras right now.

    The standout spec is the 1/1.3-inch sensor (40MP), which is significantly larger than the GoPro HERO13’s 1/1.9-inch sensor. Larger sensor means better image quality, especially in low light. Battery life is also dramatically better at roughly 4 hours compared to about 70 minutes on the GoPro. That alone makes it the more practical choice for all-day shoots.

    RockSteady 3.0 stabilization with 360-degree horizon leveling keeps footage smooth through any activity. The camera is waterproof to 20 meters without a case, and dual touchscreens (front and back) make framing easy in any situation. Built-in wifi transfers clips to your phone for quick editing and posting.

    The GoPro HERO13 Black (~$400) still leads in extreme-action stabilization (HyperSmooth 6.0) and has a unique interchangeable lens system. But for most Instagram content creators, the DJI’s better battery life, larger sensor, and lower price make it the smarter buy.

    DJI Osmo Action 5 Pro Standard Combo, Waterproof Action Camera with 1/1.3″ Sensor, 4K/120fps Video, Subject Tracking, Stabilization, Dual OLED Touchscreens, Ideal for Sports, Vlog
    • Capture Urban Nightscapes – Osmo Action 5 Pro features a new 1/1.3″ sensor for stunning low-light. Great for nighttime biking adventures in dark environments.
    • Enhanced Subject Tracking – 4nm Chip for fast, reliable framing. Keep fast-moving subjects centered. [7] The 4nm chip ensures smooth and fast framing in 16:9 or 9:16.

    DJI Osmo Pocket 3 – Best Camera for Reels

    The DJI Osmo Pocket 3 (~$519) is a wildly popular camera among Instagram and TikTok creators, and for good reason. It’s a 1-inch sensor camera with a built-in 3-axis mechanical gimbal, and the whole thing fits in your pocket.

    The gimbal produces buttery-smooth video that no software stabilization can match. It shoots 4K/120fps for slow-motion content and has a 2-inch rotatable AMOLED touchscreen that switches between horizontal and vertical shooting. For Reels and Stories, you just rotate the screen and start recording in 9:16 without any cropping.

    If your Instagram strategy leans heavily toward video content (Reels, Stories, behind-the-scenes clips), the Pocket 3 is the most efficient tool for the job. It’s not a replacement for a mirrorless camera for stills, but for video-first creators, nothing else this portable produces this quality.

    DJI Osmo Pocket 3, Vlogging Cameras with 1” CMOS & 4K/120fps Vlog Camera, 3-Axis Stabilization, Fast Focusing, Face/Object Tracking, Digital Vlogging Camera for YouTube
    • Capture Stunning Footage – This vlogging camera features a 1-inch CMOS sensor and records in 4K resolution at an impressive 120fps. Capture breathtaking night views and sunsets with enhanced clarity.
    • Effortlessly Frame Your Shots – Get the ideal composition with Osmo Pocket 3’s expansive 2-inch touch screen that rotates for both horizontal and vertical shooting.

    Choosing Your First Lens

    If you’re starting out, the kit lens bundled with your camera is a solid place to begin. Kit lenses cover a useful range of focal lengths (typically 18-45mm or 16-50mm on APS-C cameras) for everyday photography.

    After learning how your camera works with the kit lens, we recommend upgrading to a 50mm prime lens. Most camera companies sell an affordable 50mm for around $100-250, and the jump in image quality is significant. Prime lenses have wider maximum apertures (lower f-numbers), giving you more control over depth of field. That’s how you get the soft, blurred backgrounds that stand out in portrait photography.

    Once you figure out your style, additional lenses can expand your capabilities. Wide-angle lenses (~16-24mm) are great for landscapes, architecture, and cityscapes. Short telephoto lenses (~85mm) are ideal for portraits. A versatile zoom like a 24-70mm covers most situations in a single lens.

    Keep in mind that lenses aren’t interchangeable between brands (without adapters). So consider the lens ecosystem before committing to a camera system. Sony’s E-mount currently has the largest third-party lens selection, while Canon’s RF mount is growing fast. To calculate how a lens will look on a crop-sensor camera, use a crop factor calculator since focal lengths are typically listed for full-frame cameras.

    Other Photography Gear for Instagrammers

    After getting a camera, here are some accessories that can improve your Instagram photography:

    • Tripod: Essential for night photography and light painting, long exposures, and group shots. Check the maximum load rating to make sure it supports your camera’s weight. Compact travel tripods fold small enough to strap to a backpack.
    • Camera Bag: Once you accumulate a few lenses, a dedicated camera bag protects your gear while traveling. Peak Design makes some of the most popular bags among photographers for their modular design and clean look.
    • SD Cards: Fast memory cards matter, especially for 4K video and burst shooting. Look for UHS-II rated SD cards (V60 or V90) to avoid buffer slowdowns. Carry at least two cards so you always have a backup.
    • Extra Batteries: Mirrorless cameras use more battery than DSLRs did. Budget for at least one spare battery, especially for all-day shoots or travel.

    No single camera is perfect for everyone. The best choice depends on your budget, what you like to shoot, and how much gear you want to carry. A $680 Canon EOS R50 will take dramatically better photos than any smartphone, and a $2,199 Sony a7C II will produce results that rival cameras costing twice as much.

    Whatever you choose, remember that the camera is just a tool. Learning composition, lighting, and editing will improve your feed more than any gear upgrade. If you’re still building those skills, there are excellent free photography tutorials on YouTube that cover everything from exposure basics to advanced editing techniques.


    Let us know your thoughts and what you shoot on in the comments!


  • Night Light-Painting Photography Tips

    We want you all to have a great night and capture great pictures so here are some tips you can try out at ahead of time to make the most of the night instameet!

    Shooting with an iPhone/Android? Check out this tutorial.

    To start off, night photography and lightpainting have the same basic components that you use when composing an image during the day.

    ISO:
    To begin you want to find out how to adjust your camera’s ISO, the sensitivity to light.
    ISO 100, is a good place to start to capture light trails more easily.

    Now set your camera to Manual “M” to adjust both aperture and shutter speed.

    Aperture:
    The next step is to set your F-Stop, to the smallest number your lens allows, on many lenses this will be 2.8 or 3.5. This allows the most light in.

    Focus:
    Next step in setting up your shot is ensuring that your image is focused.  If you are able to, set your camera on a tripod or a flat surface.  Next, choose a focus point, and then turn your focus to manual instead of automatic.  When shooting at night, your camera often doesn’t have enough light to pick a focal point, by focusing it before the action and then turning off your autofocus you know your photo will focus where you want.

    Timer:
    Most cameras have the ability to set a timer to take photos.  By setting your camera on a 2 second (or 10 if you don’t have the 2 second option) you are eliminating the motion of your hand pressing the button.

    Using a light meter:
    Now we get to the fun part, actually beginning to capture the image!  You have your camera, on a tripod or flat surface, ISO set, F-stop set, focus set, all you need now is your shutter speed.  When shooting in manual (and every other setting) your camera will have a light meter, go ahead and adjust your shutter speed bringing the indicator on the light meter right in the middle.  This will give you a properly exposed image.  Alternatively you could adjust the aperture.

    Make sure your flash is disabled.

    Night Light-Painting Photography Tips 3
    Photo by Peter Flint

    Go ahead, snap that shutter and see how it turns out.  Practice this in a bathroom or basement, for absolute dark, or go ahead and get some light trails of cars driving by.

    Adjusting:
    If it’s too dark;
    – lengthen shutter speed or
    – increase your ISO or

    If it’s too bright:
    – shorten shutter speed or
    – decrease aperture (higher number like 8)

    Once you get it dialed in then you can add some light trails to your picture by using a small flashlight and moving it through your image.

    Thanks to Peter Flint for the intro to light painting!

    If you knew all this, awesome, help others!
    If not, don’t worry, but figure out how to adjust settings in the light before you go out in the dark!
    Hope we all have fun no matter what!

    Starting point settings:
    Manual
    No flash
    ISO 100
    Aperture 4 +or-
    Shutter Speed 15-30 seconds
    Manual Focus
    Timer 2 seconds