
We want you all to have a great night and capture great pictures so here are some tips you can try out at ahead of time to make the most of the night instameet!
Shooting with an iPhone/Android? Check out this tutorial.
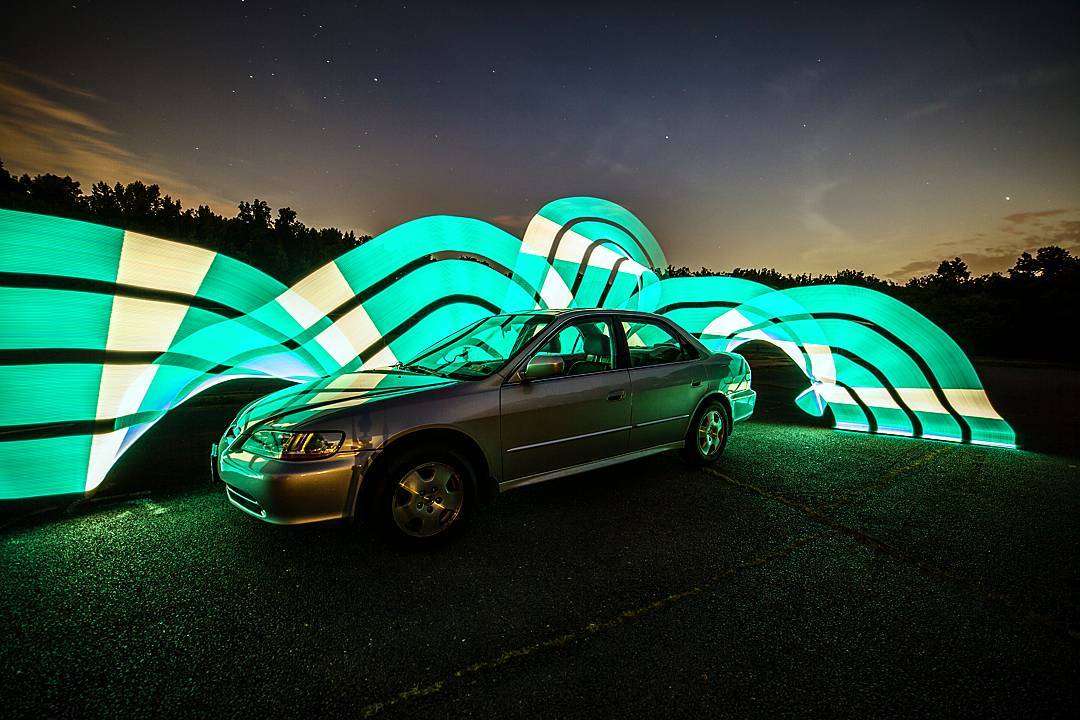
To start off, night photography and lightpainting have the same basic components that you use when composing an image during the day.
ISO:
To begin you want to find out how to adjust your camera’s ISO, the sensitivity to light.
ISO 100, is a good place to start to capture light trails more easily.
Now set your camera to Manual “M” to adjust both aperture and shutter speed.
Aperture:
The next step is to set your F-Stop, to the smallest number your lens allows, on many lenses this will be 2.8 or 3.5. This allows the most light in.
Focus:
Next step in setting up your shot is ensuring that your image is focused. If you are able to, set your camera on a tripod or a flat surface. Next, choose a focus point, and then turn your focus to manual instead of automatic. When shooting at night, your camera often doesn’t have enough light to pick a focal point, by focusing it before the action and then turning off your autofocus you know your photo will focus where you want.
Timer:
Most cameras have the ability to set a timer to take photos. By setting your camera on a 2 second (or 10 if you don’t have the 2 second option) you are eliminating the motion of your hand pressing the button.
Using a light meter:
Now we get to the fun part, actually beginning to capture the image! You have your camera, on a tripod or flat surface, ISO set, F-stop set, focus set, all you need now is your shutter speed. When shooting in manual (and every other setting) your camera will have a light meter, go ahead and adjust your shutter speed bringing the indicator on the light meter right in the middle. This will give you a properly exposed image. Alternatively you could adjust the aperture.
Make sure your flash is disabled.
Go ahead, snap that shutter and see how it turns out. Practice this in a bathroom or basement, for absolute dark, or go ahead and get some light trails of cars driving by.
Adjusting:
If it’s too dark;
– lengthen shutter speed or
– increase your ISO or
If it’s too bright:
– shorten shutter speed or
– decrease aperture (higher number like 8)
Once you get it dialed in then you can add some light trails to your picture by using a small flashlight and moving it through your image.
Thanks to Peter Flint for the intro to light painting!
If you knew all this, awesome, help others!
If not, don’t worry, but figure out how to adjust settings in the light before you go out in the dark!
Hope we all have fun no matter what!
Starting point settings:
Manual
No flash
ISO 100
Aperture 4 +or-
Shutter Speed 15-30 seconds
Manual Focus
Timer 2 seconds
Leave a Reply